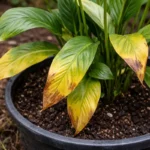
You may notice your lily bulbs developing unsightly brown spots during particularly wet weeks, which is why you need to know how to prevent fungal growth on lily bulbs during wet weeks. This occurs because excess moisture creates an ideal environment for fungal spores to thrive, leading to damage and rotting of the bulbs. If left unaddressed, the fungal infection can spread rapidly, weakening the plant and stalling its growth, but you can fix it now by checking for dampness, removing any affected bulbs, and improving air circulation around your plants.
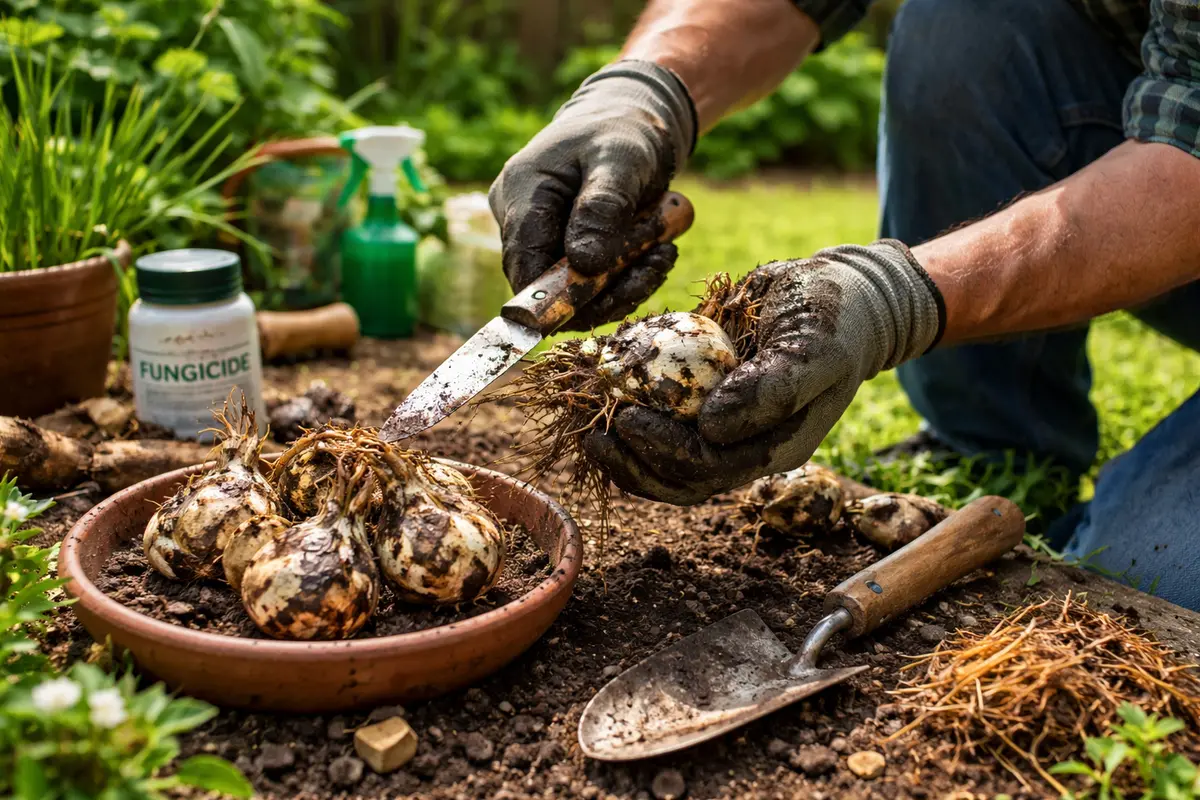
Step 1 – Treat Lily Bulbs Showing Signs of Fungus
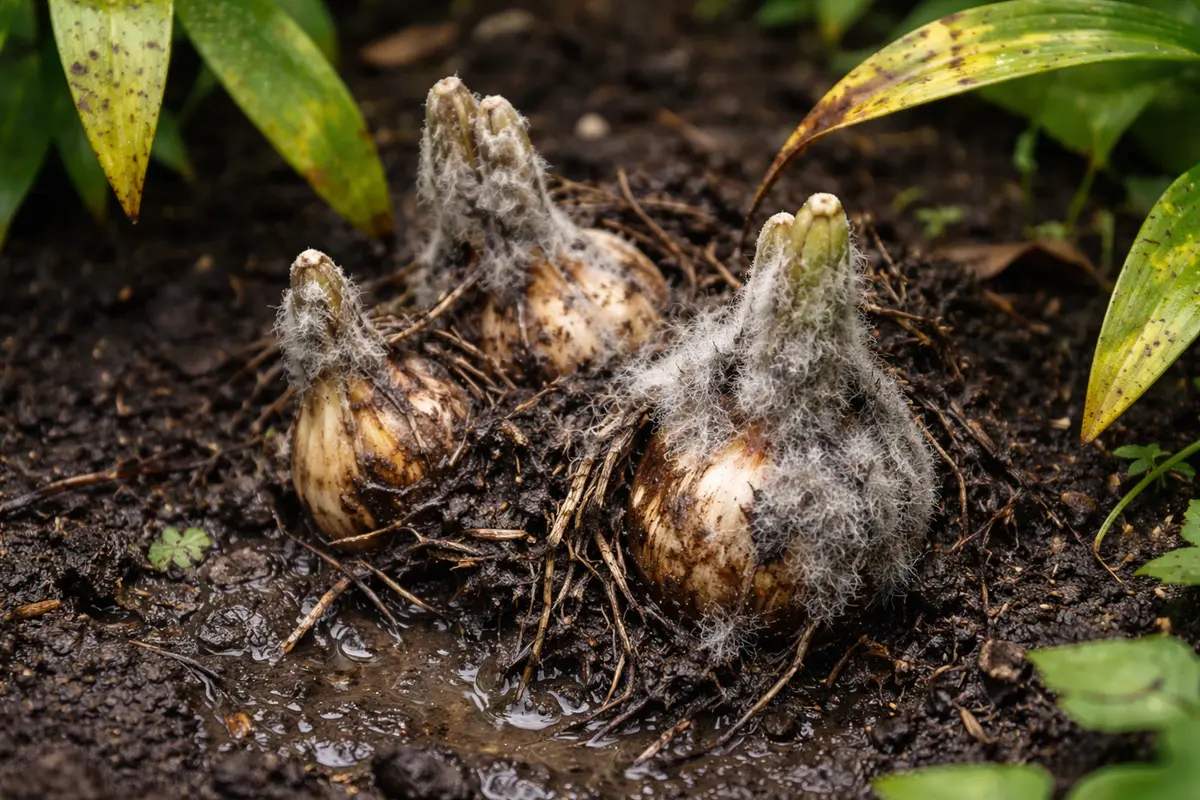
Remove any visibly infected lily bulbs immediately. You will see a reduction in the slimy texture and discoloration within a few days as the fungal growth stops spreading. Action must occur quickly to prevent the fungi from infiltrating adjacent healthy bulbs and soil. If nearby bulbs look deformed or are starting to develop similar dark spots, they too likely harbor dormant spores. Removing the infected bulbs can create a protective buffer for the healthy ones.
It’s crucial to tackle this problem swiftly because fungi can rapidly reproduce in damp conditions, threatening any uninfected bulbs. Specifically, cool, wet environments support fungal spores, which can result in rapid spread. The longer you wait to recognize and treat these symptoms, the more entrenched the fungal infection becomes, leading to deeper rot and damage that could ultimately necessitate complete bulb removal. As a test, check for a slimy texture—this is a clear indicator that intervention is needed; the earlier you act, the less extensive the damage will be.
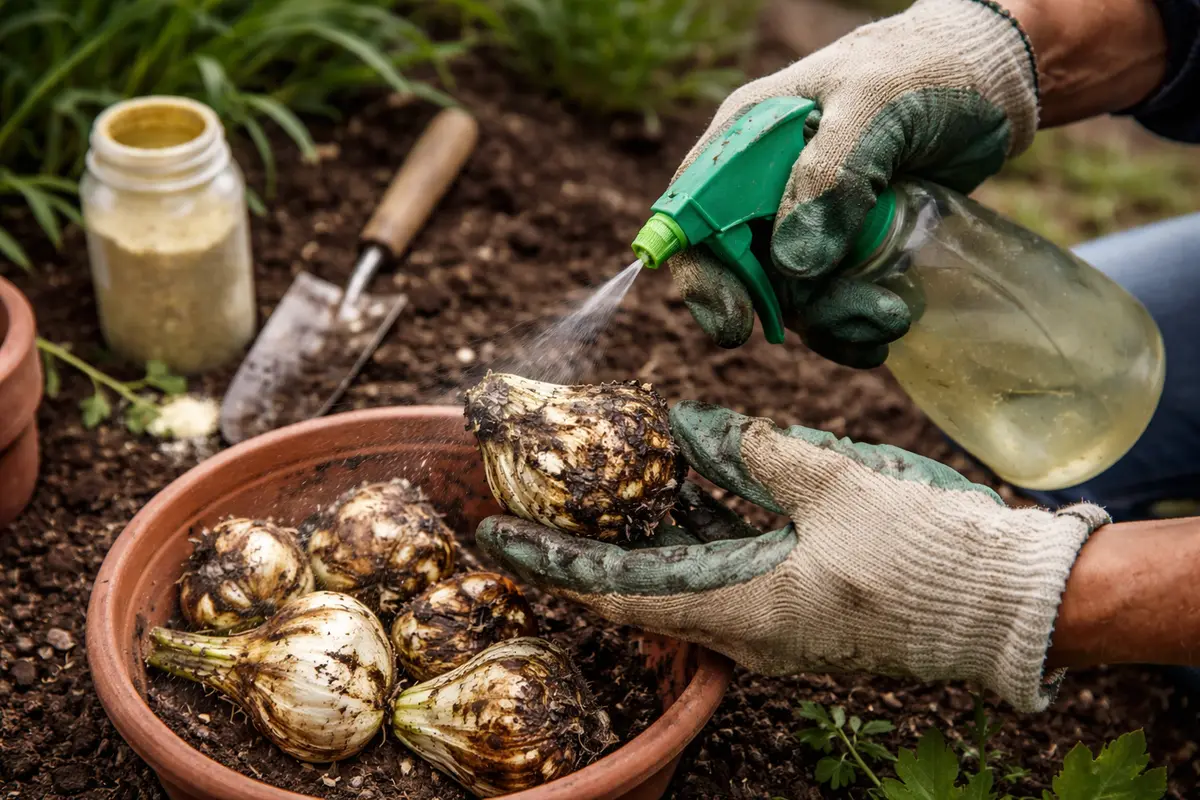
Many gardeners make the error of assuming that simply allowing damp conditions to dry out will resolve the problem. This is often insufficient, as moisture left settling on infected bulbs can exacerbate the situation. Instead, act promptly by isolating affected bulbs and sanitizing the area to prevent further infections. Consider using a diluted bleach solution on tools you use to handle bulbs to eliminate any remaining spores. If you don’t, you risk spreading the fungi instead of containing it. If the infection is severe, you might also need to apply a fungicide at this point to further prevent its spread.
Step 2 – Diagnose Excess Moisture Around Lily Bulbs
Check the soil moisture levels surrounding your lily bulbs immediately. If the soil feels overly saturated or is displaying signs of anaerobic conditions, you will observe that the soil begins to dry out after adjustments are made. To do this, you can insert a finger about two inches into the soil; if it feels consistently wet, it’s a strong sign of excess moisture. This is crucial as soggy soil is a primary contributor to bulb rot and fungal growth. Additionally, look for pooling water on the surface—this indicates that the drainage is insufficient, signaling immediate action is needed.
Excess moisture leads to poor drainage conditions, promoting root rot and causing the bulbs to struggle for oxygen and nutrients. Under these conditions, fungal spores thrive as they exploit the weakened tissue of the bulbs. In this scenario, over-saturation may also lead to the growth of pathogens, increasing the likelihood of severe fungal infections—similar to how compacted soil can suffocate roots and hinder growth. If you clearly see standing water after watering, it indicates the soil has poor drainage; make these insights a part of your troubleshooting management.
If you notice a sour smell emanating from the soil, it is a strong indicator of bacterial or fungal activity. In this case, it would be best to amend the soil with organic matter to improve drainage. A mix containing perlite or sand can help reduce compaction and enhance aeration, allowing for a healthier growing environment. If the soil remains heavy and waterlogged despite these corrections, it may be time to consider replanting your lilies in a well-draining location. This step will reinforce the need to frequently reassess drainage conditions as wet seasons pass and could save your bulbs in future rains.
Step 3 – Revive Lily Bulbs Affected by Fungal Infection
Start by removing any affected lily bulbs and treating the soil with a fungicide that targets root rot. In about a week, you should see improved soil drainage and signs that remaining bulbs are reestablishing healthy roots, indicated by new leaf growth or bulb swelling.
Recovery may take anywhere from two to six weeks, depending on environmental conditions. When lily bulbs are exposed to adequate sunlight and dry conditions, they often recover faster, producing vibrant green shoots within two weeks. Conversely, prolonged dampness can stunt regrowth, leading to yellowing leaves and stunted growth; if you see this, check for excessive moisture in the soil.
Avoid overwatering during recovery, as too much moisture can encourage fungal re-emergence. Instead, allow the top inch of soil to dry out between watering sessions. If you notice wilting despite sufficient watering, check the drainage to ensure that excess water can escape the potting mix.
Recovery from fungal growth generally takes one to three weeks, depending on environmental conditions such as humidity and temperature. Healthy regrowth includes firm, green shoots emerging from the bulbs, which signify that they are re-establishing. If the recovery is slower than expected—leaves turning yellow or mushy—check for proper drainage and ensure the soil is not overly saturated.
Avoid the mistake of overwatering during recovery, as this can worsen fungal conditions. If you notice leaf discoloration, reduce the frequency of watering, but if you see shriveled leaves, check the soil moisture levels instead. Timing is crucial; applying fertilizer too soon after lifting bulbs can shock them and slow recovery.
A realistic recovery timeline for lily bulbs varies; under ideal conditions, healthy regrowth might start within two weeks while a slower timeline could extend up to a month in cooler, damp circumstances. Watch for the emergence of strong, green shoots as a positive sign of recovery, which indicates effective root establishment as opposed to wilting or yellowing foliage, a sign of ongoing issues. If not this healthy greening → check that you are not watering too frequently, as excess moisture can lead to further fungal issues. An additional red flag is if shoots appear weak or spindly.
Avoid overcompensating with additional water or fertilizer during recovery, as this can create a nutrient imbalance and promote further fungal growth. Timing is crucial; applying fertilizer too early can overwhelm the bulbs, while waiting too long might delay their recovery. Focus instead on providing a balanced environment to encourage natural growth, monitoring humidity levels closely. If your soil tests reveal heavy nutrient concentrations, consider leaching the soil by watering heavily, ensuring to allow for proper drainage and prevent root burn.
Once the fungicide is applied, note that the active ingredients work to disrupt the cellular mechanisms of fungal growth. For example, it can inhibit spore germination or cell wall formation, providing relief and allowing the plant to recover. Healthy bulbs will start showcasing green shoots and robust foliage as the treatment takes effect while also keeping an eye out for any persistent sliminess, which indicates a need for further treatment.
Be careful not to over-fertilize during this recovery phase, as excessive nutrients can further stress the bulbs already weakened by fungal attacks. This common mistake can lead to a phenomenon called fertilizer burn, which can damage roots even further. If your lilies seem stunted despite treatment, evaluating light conditions and potentially adjusting them could support better recuperation, ensuring the plants receive sufficient light without becoming overheated. Recovery will be gradual; monitor environmental factors closely to understand root health and bulb fortitude, possibly taking notes on progress, as this could reveal patterns critical in future care.
Step 4 – Avoid Overwatering in Wet Weeks for Lilies
Monitor your watering regimen carefully to prevent overwatering during wet weeks. You should notice an even and properly aerated soil environment starting to develop, as well-draining conditions help discourage fungal growth. Utilizing a moisture meter can aid in ensuring that you are not watering too frequently; soil should feel dry down to about two inches before you add more water. Investing in durable meters can save you time in your assessments while enhancing your overall bulb health. Reducing the frequency of watering keeps the bulbs’ roots engaged without saturating them and promotes a healthier root system.
When you water excessively, especially during wet periods, you create an environment conducive to fungal proliferation, potentially leading to further issues like bulb rot or even plant death. Establishing a consistent schedule for watering while allowing the soil surface to dry out between intervals minimizes stress on the bulbs and encourages healthier growth patterns. If your lilies begin to wilt after heavy rain, it could indicate root distress or ill-timed watering schedules; actively assessing weather forecasts can help determine your watering timing.
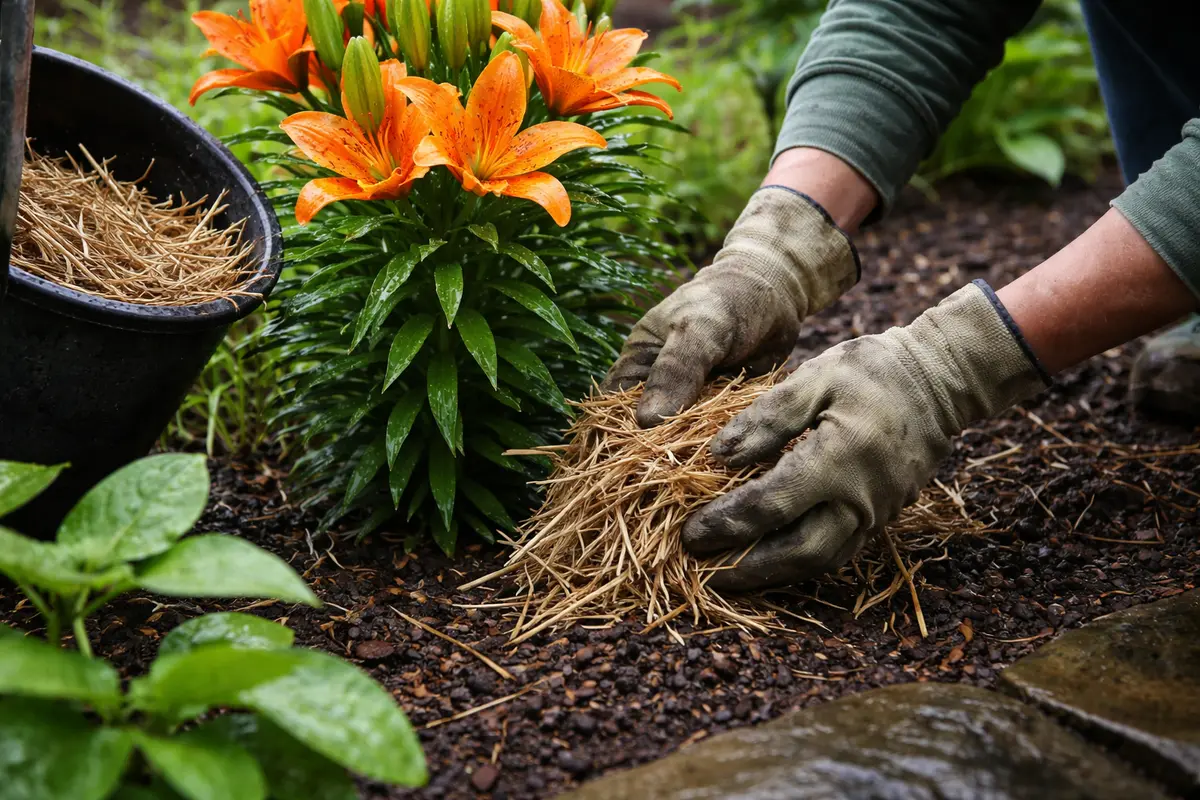
During periods of heavy rain or humidity, consider using mulch to help regulate soil moisture levels. An organic layer can also deter weeds that harbor additional moisture and pathogens. If the weather remains unpredictable, implementing a rain gauge can help inform if your plants are receiving adequate hydration. This helps counter-check against unpredictable rainfalls that might lead to over-saturation. As the weather shifts, remain flexible with your watering routine to adapt to changing conditions; not doing so could lead to a cycle of stress and recovery in your bulbs, hindering their natural resilience.
Step 5 – Inspect Bulb Condition Weekly for Fungus Signs
Start by checking your lily bulbs every few days, especially after periods of prolonged rain. Look for signs of healthy growth, such as firm stems and vibrant green leaves, contrasting with any discoloration or wilting that may indicate fungal issues. Recheck the bulbs weekly to monitor changes, and note any persistent dampness in the soil, as this could contribute to fungal development.
A fully recovered lily plant demonstrates robust stems with a smooth texture and rich green leaves, while early signs of fungal relapse include soft, mushy spots on stems or discolored, drooping leaves. If the bulbs show yellowing or a spongy feel, they could be reverting to a problematic state. If you see signs of festering spots or black patches emerging again, it’s time to take action.
If the problem returns despite your diligent monitoring, consider removing the affected bulbs to prevent the spread of fungi. Treat the remaining bulbs with a fungicide specifically designated for lilies and improve air circulation around them by spacing the plants better. If issues persist, consult with a local extension service for tailored advice on combating recurrent fungal growth.
A fully recovered lily bulb features firm, vibrant growth and a well-established root system, contrasting starkly with early signs of fungal return, which may present as soft or slimy areas. This will help you establish measurable criteria for success in your recovery efforts. By being vigilant, you can distinguish progress from mistakes and take corrective action before more serious damage ensues; frequent, scheduled checks can make it easier to prevent issues before they develop. If your monitoring reveals consistent dampness, consider that your environmental control is insufficient—indicating it is crucial for adaptation.
If you observe any signs returning, it may be necessary to repeat previous treatments or consider alternative fungicides for improved efficacy. Make sure to rotate your fungicides periodically to avoid any potential resistance forming if the same treatment is applied too often. Consistent monitoring can break the cycle of infection before it escalates, ensuring your lilies remain beautiful and healthy; remember that rapid intervention is key to managing fungal health effectively. If recurring infections continue after implementing several control measures, it may be time to consult a professional for advanced testing.
FAQ
How long does it take for lily bulbs to recover from a fungal infection?
Recovery can take 1-3 weeks, depending on the severity of the infection. You should start noticing new growth within a week after treatment begins, indicating a return to health. Bulbs that were less affected may recover faster than severely damaged ones, demonstrating the importance of early intervention.
Can fungal infections spread to other plants in my garden?
Yes, fungal infections can easily spread to neighboring plants, especially if they are in close proximity and environmental conditions are favorable for fungal growth. Maintaining good hygiene and spacing between plants can help minimize this risk. Additionally, avoid overcrowding plants to allow for optimal air circulation, reducing fungal proliferation potential by promoting a healthier environment for all your flowers.
Should I remove all affected lily bulbs immediately?
Only remove severely affected bulbs that show extensive damage or rot. If some bulbs display mild symptoms, treat them with fungicides rather than discarding them. This allows for the chance of recovery while minimizing waste. If you’re unsure if a bulb is salvageable, consider treating it first, observing how it responds before deciding to remove it, always err on the side of preservation.