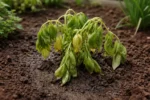
You may notice that your zinnias appear wilted and lack vibrant blooms after a period of soggy soil, which is why you might be asking yourself, “Why are my zinnias not blooming after soggy soil?” The excess moisture can lead to root rot and other issues, causing the plants to show signs of yellowing and drooping. If left unchecked, this problem can worsen and weaken the plant; however, you can still turn things around by inspecting the soil, adjusting your watering habits, and improving drainage.
Step 1 – Assess Zinnia Roots for Soggy Soil Damage
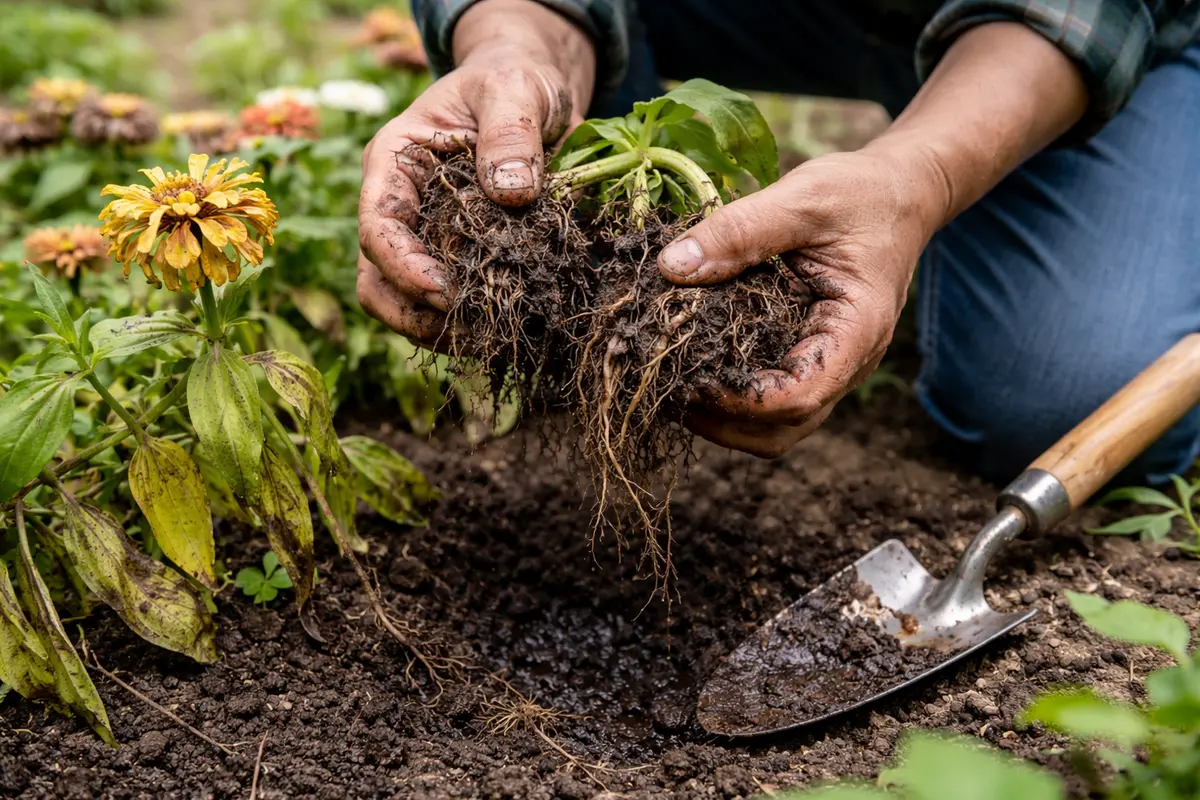
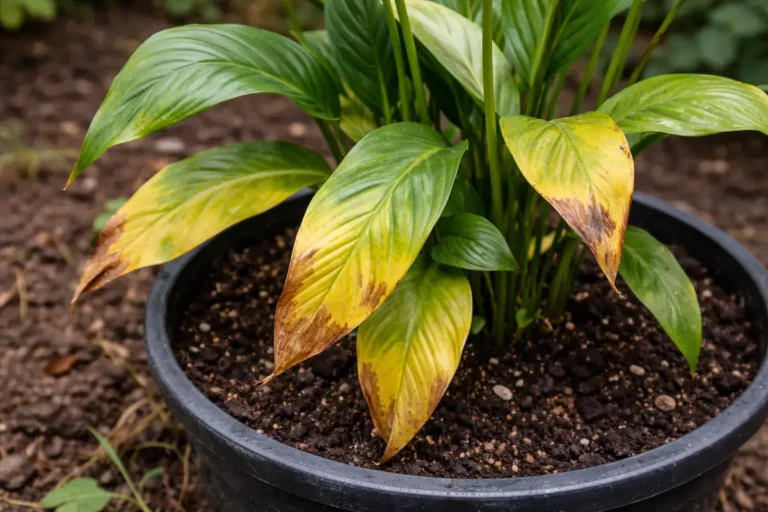
Begin by checking the soil moisture and root condition of your zinnias. You should see whether the soil is overly wet and if the roots appear brown or mushy. This immediate action will help you confirm any damage done by excess moisture. To check, gently pull back some of the soil along the root zone without disturbing the roots excessively. Pay close attention; if the soil feels like a mud pie, it’s a clear indicator that your zinnias are in trouble.
Inspecting the roots promptly helps establish if the zinnias are suffering from root rot, a condition where roots lose their ability to take in nutrients and water due to prolonged saturation. In these instances, oxygen levels around the roots drop, depriving them of essential airflow, which leads to decay. If the surface soil appears dry but the deeper soil remains wet, roots may still be at risk. This observation indicates that while the upper portion might seem fine, there could still be hidden damage below. Acting quickly reduces the chances of damage spreading to the entire plant within days. If you find that the roots are brown and feel mushy rather than firm, immediate steps need to be taken to salvage the plant.
A common mistake gardeners make at this stage is assuming all is well just because plant leaves remain green. If you notice a sudden droopiness right after periods of heavy rain or prolonged watering, proceed with a thorough inspection. Some may also overlook the smell; a rotting odor near the base indicates severe root health issues. Don’t delay; the sooner you take action, the better the odds are for recovery. Ignoring subtle signs can lead to total plant failure, especially when fungal infections have taken root. If the roots feel wet and do not respond to a gentle squeeze, this indicates that they are probably too saturated and can harm the entire plant.
Step 2 – Diagnose Causes of Zinnia Flowering Issues
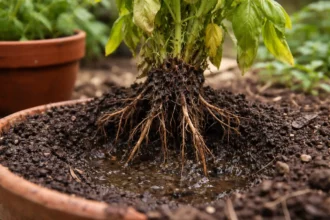
Check for any visible signs of root rot and identify areas needing attention. See whether the roots are brown and slimy; this indicates poor conditions leading to nutrient deficiency. This diagnosis is critical because it directly informs the corrective measures necessary for your zinnias. Make sure to check the soil texture, too; if it’s compacted, the roots may not be able to breathe at all. Soft, crumbly soil promotes healthier growth and can be checked by grabbing a handful and pressing it gently. If it holds together without becoming muddy or falling apart, it’s a sign of good structure. If it clumps excessively or feels sticky, that’s a warning sign of soil compaction.
Root rot primarily develops from continuously saturated soil, which causes soil compaction and limits air circulation. Roots need adequate aeration to function effectively, and without it, the plants can’t uptake nutrients, resulting in wilting and failure to bloom. If you identify tightly packed soil, an immediate remedy is to loosen it up to enhance drainage. For instance, incorporating materials like perlite or coarse sand can help improve the aeration capacity of the soil. Identifying this issue now allows you to intervene before the plant faces irreparable harm.
If you find that the roots are blackened and smell foul, it confirms that root rot has set in. In these scenarios, you could opt to trim away the affected roots to promote healthy growth. A sharp, sterile pair of scissors or pruning shears will prevent further damage during cutting. Focus on removing only the severely affected roots, as cutting too many may shock the plant. After trimming, ensure you apply a fungicide to the remaining root area, as this can help eliminate lingering pathogens. If the soil drains poorly or retains too much moisture, a complete change of soil may be necessary. Alternatives include adjusting drainage and pot size to enhance airflow around the roots and avoid future complications. A larger pot allows for more soil and therefore a more extensive root system, which can sometimes correct nutrient deficiencies more effectively.
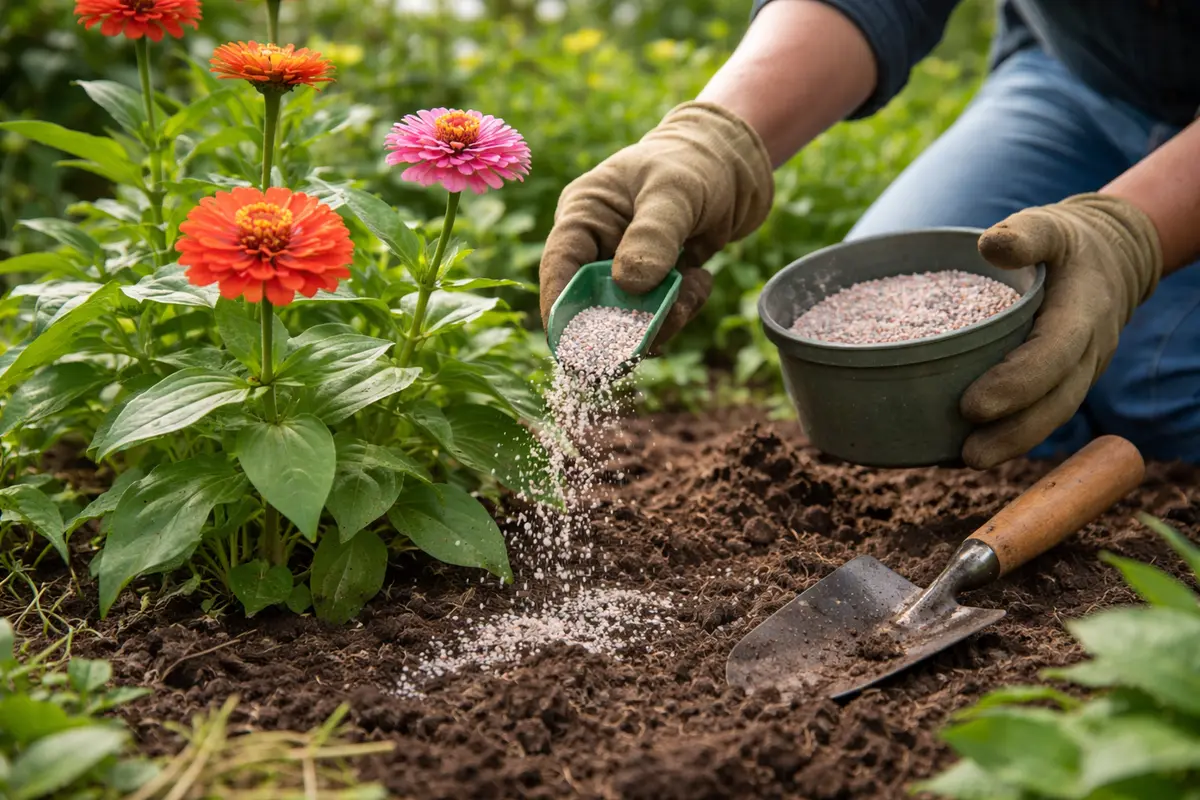
Step 3 – Fertilize Zinnias to Encourage Blooming
Remove any excess water around your zinnias by improving drainage; lift pots off soggy surfaces or amend soil with materials like perlite or sand. In a few days, you should notice the soil drying out and healthier foliage starting to emerge, signaling that the plants are on the path to recovery. If you find that zinnias still struggle to regain turgidity, indicating they remain malnourished, it may be time to introduce a diluted fertilizer.
Recovery can take anywhere from a week to several weeks, depending on the extent of the water damage. Healthy regrowth typically includes new leaves unfurling and a more vibrant overall appearance. Conditions such as warmer temperatures and increased sunlight can accelerate recovery, while prolonged dampness or cool temperatures can hinder it. During this recovery window, measure temperature and light exposure, ensuring zinnias receive at least 6 hours of direct sunlight daily. If wilting persists despite improved drainage, check for root rot by gently inspecting the roots. If they remain affected, further action will be needed, perhaps using a stronger fungicide to battle the rot still lingering.
A common mistake during recovery is applying overly rich fertilizers or excessive watering, which can further stress the zinnias. Timing is crucial; wait until the plants show visible improvement—like newfound leaf vigor—before reintroducing any fertilizer. Ideally, use a balanced solution with a nitrogen-phosphorus-potassium ratio of approximately 5:10:5. If you notice yellowing leaves still present after adjusting your watering practices, check for pests that may also be affecting your zinnias. Regular foliar checks can help catch infestations early, allowing for quick remedies before the situation worsens.
The right fertilizer, rich in nitrogen, phosphorus, and potassium, can significantly boost the flowering phase of zinnias, helping them recover from the stress of soggy conditions. As roots begin to perk up again, they’ll absorb these nutrients, allowing for fresh foliage and upcoming blossoms. Targeted feeding should occur around the base of the plant, taking care to avoid direct contact with roots to minimize fertilizer shock. A gradual revival may take place over a week or two, depending heavily on plant conditions and seasonal factors.
A crucial point during this recovery step is to avoid over-fertilizing, as this can lead to nutrient burn, especially if roots are still sensitive from prior water damage. Application should be limited—the label directions should allow you to avoid over-concentration. A common slip-up occurs when gardeners are too eager to bring their plants back to health and apply more fertilizer than necessary. Therefore, always apply fertilizers as directed, closely monitoring the plants for signs of new growth or stress. In multifactor scenarios, such as nutrient-poor or tightly packed soils, consider aerating the soil before fertilizing to boost recovery further. Gentle aeration practices promote better drainage and allow the fertilizer to penetrate more effectively, so simple scraping with a fork can be a good strategy.
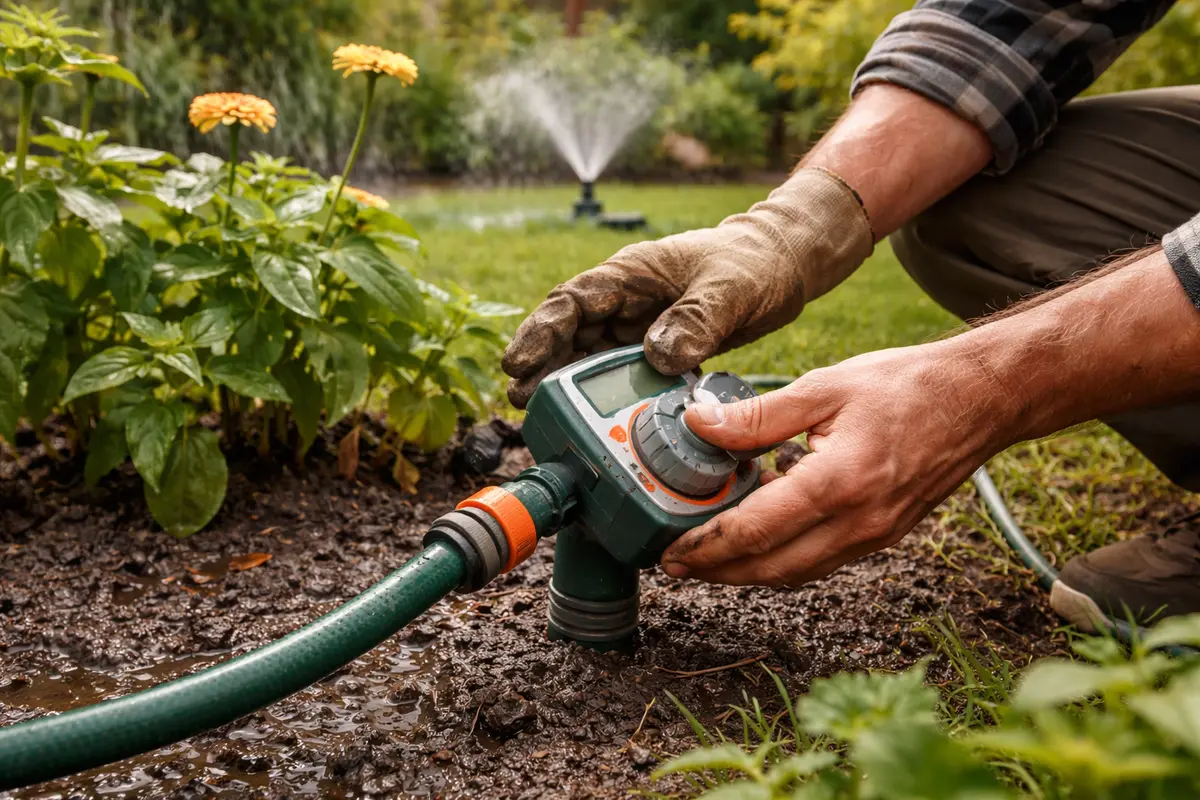
Step 4 – Adjust Watering Schedule to Prevent Over-Saturation
Start by allowing the soil surrounding your zinnias to dry out between watering sessions. By establishing a routine of checking the soil moisture with your finger, inserted up to a couple of inches, you will be able to prevent further sogginess, leading to more vibrant blooms as proper drainage promotes healthy development. If your finger emerges wet, hold off on watering until further checks indicate dryness.
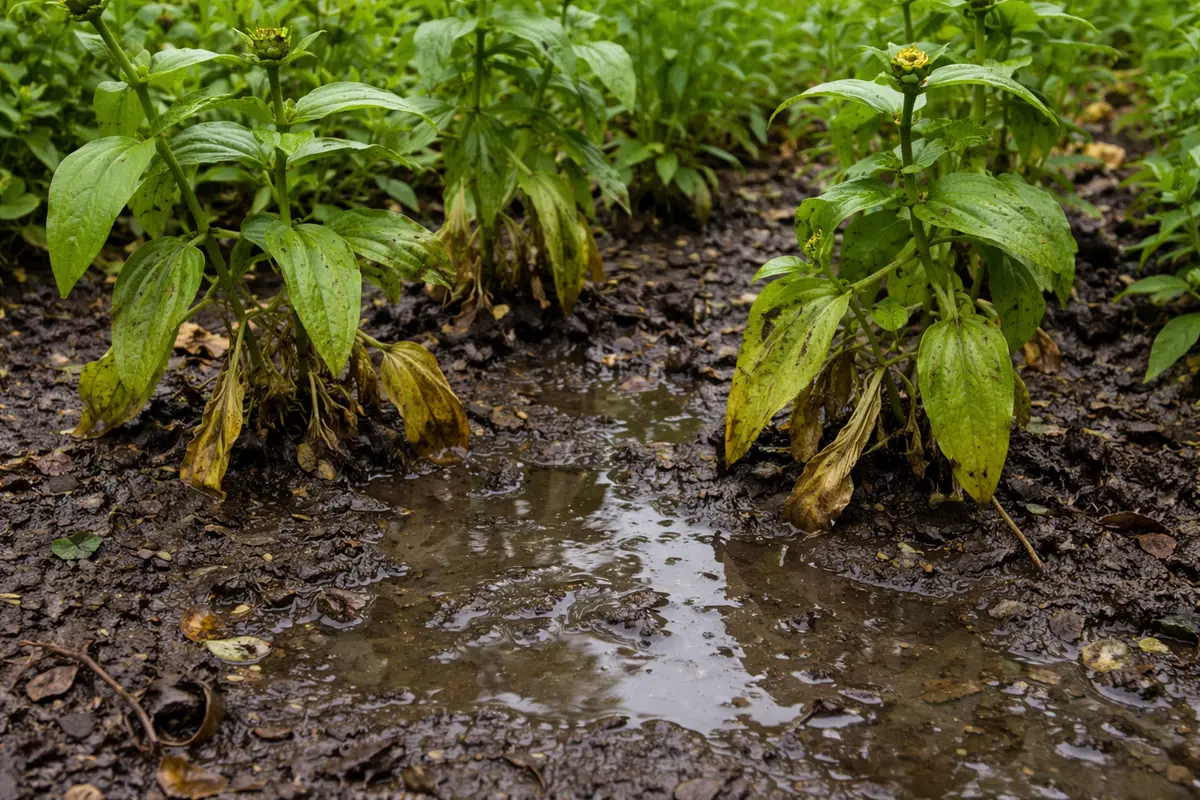
Persistent soggy soil often triggers root rot, which leads to non-blooming in zinnias. When zinnias sit in overly saturated conditions, their roots struggle to take in essential nutrients, leading to a cascade of wilting and yellowing in the foliage. By ensuring that soil dries out properly, you directly address the root cause of stunted growth and flowering. If you notice the lower leaves yellowing or dropping off, check for overly wet soil conditions immediately. This symptom often precedes complete saturation.
In seasons with heavy rainfall, implement a layer of mulch around your zinnias to improve drainage while retaining some moisture. This adaptation keeps the plants hydrated without risking root rot, especially during wet spring periods. If growth still appears stunted despite these measures, check if your zinnias are too shaded or crowded by neighboring plants. If necessary, consider relocating them to a sunnier position or thinning adjacent plants to enhance airflow.
Watering practices directly influence plant health, especially under conditions that previously led to soggy soil. If you allow the soil to dry by at least 2 inches between waterings, you’ll encourage root oxygenation, fostering stronger root systems that are less susceptible to rot. Ensure drainage holes in pots remain unblocked, which is a common oversight that affects moist soil retention. Consider watering in the early morning to reduce evaporation and promote hydration before daytime heat sets in. To establish an effective watering rhythm, incorporate weather patterns into your schedule, modulating increases during dry spells while cutting back after rainy periods.
Some gardeners make the mistake of continuing to water frequently out of habit, even when the soil still feels moist. Instead, adopt a policy of checking the soil’s surface regularly to gauge moisture levels—this practice allows for better-informed watering decisions. If you notice a tendency for quick re-wetting, consider changing pot positioning or enhancing drainage options, such as adding perlite or enhancing pot drainage. Increasing drainage through adjustments helps avoid waterlogging while maintaining adequate moisture levels for root uptake. Remember, experience shows that a well-draining potting mix can significantly improve overall health and resilience.
Step 5 – Inspect Zinnias for Signs of New Growth Regularly
Monitor your zinnias every few days for signs of new growth and improved vigor. You should look for robust leaf structures and blossoming flowers as indicators of recovery. A healthy zinnia will show renewed leaf growth and may even display flower buds developing, indicating effective recovery. Keep detailed notes on growth stages; this will help identify patterns that contribute to healthy blooms. These indicators are essential as they confirm that the plants are on the path to recovery.
New growth should manifest as firm, healthy leaves and burgeoning flower buds. When monitoring, keep in mind that a revived zinnia will display vibrant colors and sturdy foliage; this evolutionary rebound contributes positively to its blooming capacity. If leaves appear pale or flimsy, it may indicate that nutrient uptake is still compromised, often a result of insufficient fertilization or lingering root damage. If you observe changes in leaf firmness or yellowing, these could signal a return of overwatering issues.
If symptoms start to return, consider re-evaluating your watering and fertilization strategy promptly. You may need to adjust spacing or airflow around the plants to mitigate cumulative water stress. For instance, ensuring at least 6 to 12 inches of space between your zinnias can help improve air circulation. Keeping a close eye on your zinnias and promptly addressing changes will facilitate a successful recovery and subsequent flowering period. Establish a journal or checklist to record the plants’ progress, including dates and conditions; this documentation can provide useful data points for future planting seasons.
FAQ
How long does it take for zinnias to recover after soggy soil?
After correcting the issue, zinnias typically show signs of recovery within 1-3 weeks, depending on environmental conditions and the extent of root damage. With proper care, you may see new leaves and blooms developing shortly. However, don’t expect immediate results; patience and consistent care are crucial during this phase.
Should I remove affected leaves from my zinnias?
Yes, it’s advisable to cut back any dead or wilted leaves to help redirect the plant’s energy into healthy growth. Doing so can improve air circulation around the plant and reduce the risk of further fungal issues. Be sure to use sterilized cutting tools to minimize the risk of introducing pathogens during this process.
Will zinnias bloom again after being waterlogged?
Yes, with proper care and recovery measures, zinnias have a good chance of blooming again. Ensure that you follow proper watering and fertilization routines to optimize their chances of successful flowering. Regular monitoring of environmental conditions, like humidity and light, also plays a critical role in their recovery and future blooming.